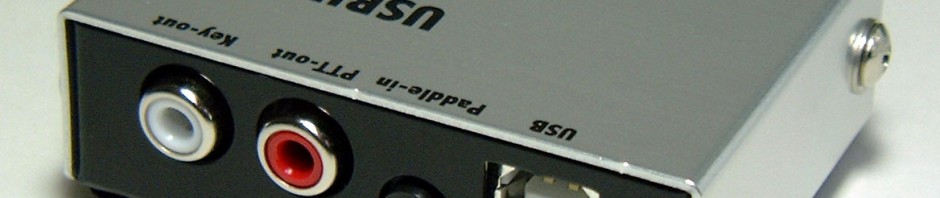
USBIF4CW Gen.3またはUSBIF4CWをWSJT-Xで使用したいというお問い合わせを受けることがあります。WSJT-Xはソースコードが公開されていますので、USBIF4CW用のソフトウェア開発者向け制御ライブラリを使用することで対応させることができます。手順は下記のとおりです。
WSJT-XはソフトウェアライセンスがGPL(GNU General Public License)のため、USBIF4CW制御ライブラリを呼び出すように改変したソースコードやソフトウェアのバイナリ自体をWebで公開することができません。お手数ですが、下記に改変のポイントを示しますのでお使いになる際には個別にコンパイルしていただきますようお願いします。
以下の手順について意味が分からないかたは上記の方法によるソースコードのコンパイルはお勧めしません。どうしてもUSBIF4CW Gen.3に対応したバイナリが必要なかたはお問い合わせフォームからご連絡ください。
制御ライブラリの設置
ディレクトリ「lib/usbif4cw」を作ってUSBIF4CW用のソフトウェア開発者向け制御ライブラリを設置します。
- usbif4cw.dll
- usbif4cw.h
ヘッダファイル「usbif4cw.h」の内容は下記のとおりです。
#ifndef USBIF4CW_H
#define USBIF4CW_H

extern "C" {
  __declspec(dllexport) long __stdcall usbif4cwOpen(long param);
  __declspec(dllexport) void __stdcall usbif4cwClose(int nId);
  __declspec(dllexport) long __stdcall usbif4cwWriteData(int nId, int port, unsigned char data);
  __declspec(dllexport) long __stdcall usbif4cwReadData(int nId, int port);
  __declspec(dllexport) long __stdcall usbif4cwPutChar(int nId, unsigned char c);
  __declspec(dllexport) long __stdcall usbif4cwPutCode(int nId, unsigned char c);
  __declspec(dllexport) long __stdcall usbif4cwIsTxBusy(int nId);
  __declspec(dllexport) long __stdcall usbif4cwTxCancel(int nId);
  __declspec(dllexport) long __stdcall usbif4cwSetPTT(int nId, unsigned char tx);
  __declspec(dllexport) long __stdcall usbif4cwSetPTTParam(int nId, unsigned char nLen1, unsigned char nLen2);
  __declspec(dllexport) long __stdcall usbif4cwSetWeight(int nId, int nDot, int nDash);
  __declspec(dllexport) long __stdcall usbif4cwSetPaddle(int nId, unsigned char param);
  __declspec(dllexport) long __stdcall usbif4cwSetWPM(int nId, int nWPM);
  __declspec(dllexport) long __stdcall usbif4cwGetWPM(int nId);
  __declspec(dllexport) long __stdcall usbif4cwSetCallbackWindow(int nId, long hWnd);
  __declspec(dllexport) long __stdcall usbif4cwSetSideTone(int nId, unsigned char nTone);
  __declspec(dllexport) long __stdcall usbif4cwGetVersion(int nId);
}

#endif /* USBIF4CW_H */
「widgets/mainwindow.cpp」に変更を加えます。
USBIF4CWにPTT制御およびオーディオソース切り替え信号を出力するための変更です。
ファイル冒頭にヘッダファイルをインクルードしている箇所がありますので下記の1行を加えます。
#include "usbif4cw.h"
コンストラクタ「MainWindow::MainWindow(…」の中に「m_block_udp_status_updates {false}」と書かれた行を見つけて下記のように書き換えます。
m_block_udp_status_updates {false},
m_usbif4cw_id {-1}
関数「MainWindow::closeEvent(…」を編集します。
void MainWindow::closeEvent(QCloseEvent * e)
{
  // close USBIF4CW device
  // QMessageBox::information(this, tr("USBIF4CW"), tr("close USBIF4CW device"));
  if (m_usbif4cw_id != -1) {
    usbif4cwClose(m_usbif4cw_id);
    m_usbif4cw_id = -1;
  }
  m_valid = false;              // suppresses subprocess errors
  m_config.transceiver_offline ();
  writeSettings ();
  ...(省略)...
関数「MainWindow::startTx2()」を編集します。
void MainWindow::startTx2()
{
  if (!m_modulator->isActive ()) { // TODO - not thread safe
    // open USBIF4CW device
    if (m_usbif4cw_id == -1) {
      // QMessageBox::information(this, tr("USBIF4CW"), tr("open USBIF4CW device"));
      m_usbif4cw_id = usbif4cwOpen(0);
    }
    if (m_usbif4cw_id == -1) {
      QMessageBox::warning(this, tr("Error"), tr("USBIF4CW device open error"));
    } else {
      // PTT output: ON, Microphone switching: ON
      // QMessageBox::information(this, tr("USBIF4CW"), tr("USBIF4CW PTT = ON"));
      if (usbif4cwWriteData(m_usbif4cw_id, 0, 0xFF & 0xFD & 0xF7) != 0) {
        QMessageBox::warning(this, tr("Error"), tr("USBIF4CW device data write error"));
      }
    }
    double fSpread=0.0;
    double snr=99.0;
    QString t=ui->tx5->currentText();
    ...(省略)...
関数「MainWindow::stopTx()」を編集します。
  ...(省略)...
  }
  ptt0Timer.start(200);                       //end-of-transmission sequencer delay
  monitor (true);
  if (m_usbif4cw_id != -1) {
    // PTT output: OFF, Microphone switching: OFF
    // QMessageBox::information(this, tr("USBIF4CW"), tr("USBIF4CW PTT = OFF"));
    if (usbif4cwWriteData(m_usbif4cw_id, 0, 0xFF) != 0) {
      QMessageBox::warning(this, tr("Error"), tr("USBIF4CW device data write error"));
    }
  }
  statusUpdate ();
}
「widgets/mainwindow.h」に変更を加えます。
「//—————————————————- private functions」の行を見つけ、その前に下記の1行を加えます。
long m_usbif4cw_id;
コンパイル方法の変更
「CMakeLists.txt」を編集します。
下記の箇所を見つけ、
set_target_properties (wsjtx PROPERTIES
  MACOSX_BUNDLE_INFO_PLIST "${CMAKE_CURRENT_SOURCE_DIR}/Darwin/Info.plist.in"
  ...中略...
  MACOSX_BUNDLE_GUI_IDENTIFIER "org.k1jt.wsjtx"
  )
その後に下記の行を加えます。
include_directories (${CMAKE_SOURCE_DIR}/lib/usbif4cw)
find_library(USBIF4CW_LIBRARY
  NAMES usbif4cw libusbif4cw
  PATHS ${CMAKE_SOURCE_DIR}/lib/usbif4cw)
続くブロック「target_include_directories…」の中にある下記の箇所を見つけ、
target_link_libraries (wsjtx wsjt_fort_omp wsjt_cxx wsjt_qt wsjt_qtmm ${hamlib_LIBRARIES} ${FFTW3_LIBRARIES})
ここを次のように書き換えます。
target_link_libraries (wsjtx wsjt_fort_omp wsjt_cxx wsjt_qt wsjt_qtmm ${hamlib_LIBRARIES} ${FFTW3_LIBRARIES} ${USBIF4CW_LIBRARY})
コンパイルしたバイナリファイルの使用方法
32ビット版のWSJT-Xをインストール後、実行ファイルを置き換えれば使用できます。また、同じフォルダへUSBIF4CWの制御ライブラリ「usbif4cw.dll」を設置してください。
WSJT-Xの送受信を検出してUSBIF4CW Gen.3(またはUSBIF4CW)を制御しますので特に設定は要りませんが、USBIF4CW Gen.3(またはUSBIF4CW)をPCへ接続した状態でお使いください。まずは下記設定でお試しください。
Rig: None
PTT Method: VOX
正常動作しましたら、PTT Method設定はそのままにしておき、Rigの設定でお使いの無線機がCATコントロールできるように設定してみてください。
制限事項
WSJT-Xの32ビット版のみで有効です。64ビット版では試していません。