前回はデータ分析と機械学習を取り扱いました。今回はWeb開発をPythonでおこなう方法について学んでいきましょう。
PythonとWeb開発
ひとことにWeb開発といっても、現在は開発環境が沢山あります。多くの場合フロントエンド・バックエンド・データベースの3点セットで構成されています。
図で表すとこのような形です。
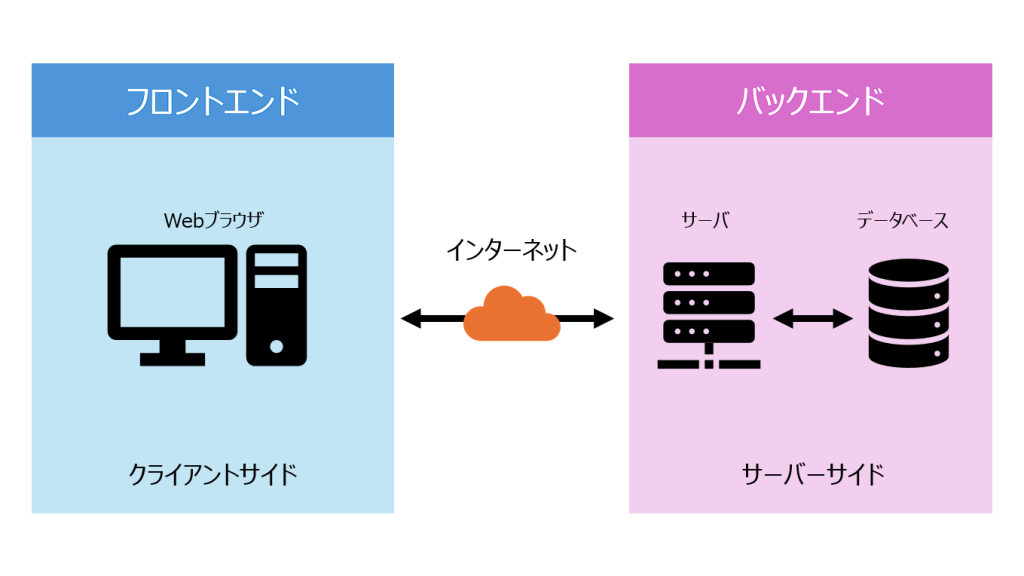
この図の中で、Pythonはバックエンドのサーバに当たる部分を担います。では、なぜPythonがWeb開発で用いられるケースがあるのでしょうか。
Pythonには、DjangoやFlaskなどの強力なWebフレームワークがあります。例えば、Djangoはフルスタックフレームワークであり、迅速な開発を可能にする多くの機能を提供します。また、Flaskは軽量で柔軟性があり、小規模なアプリケーションやAPIの構築に適しています。さらに、FastAPIのようなAPI用のフレームワークなどもあります。
| フレームワーク名 | 特徴 | 規模 | 利用例 |
|---|---|---|---|
| Django | – フルスタックフレームワーク – 管理画面を自動生成 – ORM(Object-Relational Mapping)を内蔵 – セキュリティ機能が充実 | 中〜大規模 | – YouTube – Mozilla – Spotify |
| Flask | – マイクロフレームワーク – 拡張性が高く、必要な機能を追加可能 – シンプルなルーティングとテンプレートエンジン | 小〜中規模 | – Netflix – Uber |
| FastAPI | – 高速なパフォーマンス – 自動生成されるAPIドキュメント – 型ヒントを活用した開発 – 非同期処理に対応 | 小〜大規模 | – Microsoft – Uber – Netflix |
さらに、Pythonは第5回でもお話ししたとおり、データサイエンスや機械学習にも利用されています。そのため、Webサイトで得た膨大なデータをAIなどで処理したいというニーズがあるときに、機能を容易に統合できる、などのメリットがあります。
ちなみに、前回の最後に扱ったM-LSDの動作デモはFlaskを使ったものでした。すでにWebフレームワークと機械学習の合わせ技は体験していたわけですね。
Django
フルスタックフレームワークで、PythonでWeb開発したいと思ったときに選んでおけば間違いない、というポジションに当たります。ただ、機能が豊富なため学習コストは高めです。マスターすると高給取りのバックエンドエンジニアの道が開けます。
今回はブログサイトを構築するデモを用意したので、Djangoがどのようなものかを体験していきましょう。
まずは任意のディレクトリに仮想環境を構築してアクティブ状態にしましょう。
python -m venv .venv
.\.venv\Scripts\activate
次にプロジェクトの作成です。今回はmyblogという名前で構築します。
django-admin startproject myblog次にblogという名前のアプリケーションを作成します。
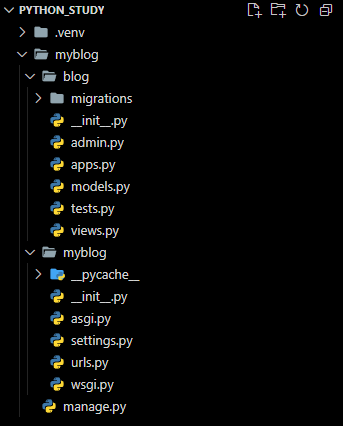
cd myblog
python manage.py startapp blog
この段階でのディレクトリ構造はこのようになります。
次にデータベースの初期化をします。
python manage.py migrateチェックリストがすべてOKの場合成功です。
Operations to perform:
  Apply all migrations: admin, auth, contenttypes, sessions
Running migrations:
  Applying contenttypes.0001_initial... OK
  Applying auth.0001_initial... OK
  Applying admin.0001_initial... OK
  Applying admin.0002_logentry_remove_auto_add... OK
  Applying admin.0003_logentry_add_action_flag_choices... OK
  Applying contenttypes.0002_remove_content_type_name... OK
  Applying auth.0002_alter_permission_name_max_length... OK
  Applying auth.0003_alter_user_email_max_length... OK
  Applying auth.0004_alter_user_username_opts... OK
  Applying auth.0005_alter_user_last_login_null... OK
  Applying auth.0006_require_contenttypes_0002... OK
  Applying auth.0007_alter_validators_add_error_messages... OK
  Applying auth.0008_alter_user_username_max_length... OK
  Applying auth.0009_alter_user_last_name_max_length... OK
  Applying auth.0010_alter_group_name_max_length... OK
  Applying auth.0011_update_proxy_permissions... OK
  Applying auth.0012_alter_user_first_name_max_length... OK
  Applying sessions.0001_initial... OK
次にサイトのモデル構築と設定をしていきます。models.pyを編集していきます。もともとあった内容をすべて削除し、こちらに置き換えてください。
from django.db import models
from django.utils import timezone

class Post(models.Model):
    title = models.CharField(max_length=200)
    content = models.TextField()
    created_date = models.DateTimeField(default=timezone.now)
    published_date = models.DateTimeField(blank=True, null=True)

    def publish(self):
        self.published_date = timezone.now()
        self.save()

    def __str__(self):
        return self.title
次に設定ファイルです。settings.pyを開き、アプリケーションの追加と言語設定をします。
INSTALLED_APPS = [
    'django.contrib.admin',
    'django.contrib.auth',
    'django.contrib.contenttypes',
    'django.contrib.sessions',
    'django.contrib.messages',
    'django.contrib.staticfiles',
    'blog',  # 追加
]

# 言語とタイムゾーンの設定(106行目付近)
LANGUAGE_CODE = 'ja'
TIME_ZONE = 'Asia/Tokyo'
これらの設定を反映させるためのコマンドを打ちます。
python manage.py makemigrations blog
python manage.py migrate
こちらもOKが出れば成功です。
$ python manage.py makemigrations blog
Migrations for 'blog':
  blog\migrations\0001_initial.py
    - Create model Post
$ python manage.py migrate
Operations to perform:
  Apply all migrations: admin, auth, blog, contenttypes, sessions
Running migrations:
  Applying blog.0001_initial... OK
次は管理画面の作成です。admin.pyを編集していきます。元の内容を削除しこちらに置き換えてください。
from django.contrib import admin
from .models import Post

admin.site.register(Post)
次に管理者アカウントを作成します。
python manage.py createsuperuserこちらは自由に設定していただいて構いません。今回メールアドレスは使用しないので、架空のもので問題無いです。パスワードは入力しても表示されないのでタイプミスに注意してください。
$ python manage.py createsuperuser
ユーザー名: admin
メールアドレス: test@example.com
Password:
Password (again):
Superuser created successfully.
次にサイトの表示設定をしていきます。views.pyをこちらに置き換えてください。
from django.shortcuts import render, get_object_or_404
from django.utils import timezone
from .models import Post

def post_list(request):
    posts = Post.objects.filter(published_date__lte=timezone.now()).order_by('-published_date')
    return render(request, 'blog/post_list.html', {'posts': posts})

def post_detail(request, pk):
    post = get_object_or_404(Post, pk=pk)
    return render(request, 'blog/post_detail.html', {'post': post})
URLの設定をします。ユーザのアクセスを振り分ける設定ですね。urls.pyを下記に置き換えます。
from django.contrib import admin
from django.urls import path, include

urlpatterns = [
    path('admin/', admin.site.urls),
    path('', include('blog.urls')),
]
次にblogディレクトリ直下にurls.pyを作成します。作成できたらこちらを書き入れます。
from django.urls import path
from . import views

urlpatterns = [
    path('', views.post_list, name='post_list'),
    path('post/<int:pk>/', views.post_detail, name='post_detail'),
]
次にサイトの表示部分を作成します。まずはhtmlファイルを設置するディレクトリを作成します。
mkdir -p blog/templates/blogDjangoではtemplatesという名前にhtmlファイル、staticにcssやjsファイルを設置するお約束があります。
うまくいったらblogディレクトリ直下に3つのhtmlファイルを作成します。こちら長いので畳んでおきます。都度展開してコピーしましょう。
{% load static %}
<!DOCTYPE html>
<html>
<head>
    <title>Djangoブログ</title>
    <style>
        body {
            font-family: 'Helvetica', sans-serif;
            margin: 0;
            padding: 0;
            background-color: #f4f4f4;
        }
        .container {
            width: 80%;
            margin: 0 auto;
        }
        header {
            background-color: #2c3e50;
            color: white;
            padding: 20px 0;
            text-align: center;
        }
        .content {
            background-color: white;
            padding: 20px;
            margin-top: 20px;
            border-radius: 5px;
            box-shadow: 0 2px 5px rgba(0,0,0,0.1);
        }
        h1, h2 {
            color: #2c3e50;
        }
        .date {
            color: #777;
            font-size: 0.8em;
        }
        a {
            color: #3498db;
            text-decoration: none;
        }
        a:hover {
            text-decoration: underline;
        }
    </style>
</head>
<body>
    <header>
        <div class="container">
            <h1><a href="/" style="color: white; text-decoration: none;">Djangoブログ</a></h1>
        </div>
    </header>

    <div class="container">
        <div class="content">
            {% block content %}
            {% endblock %}
        </div>
    </div>
</body>
</html>{% extends 'blog/base.html' %}
{% block content %}
<h1>ブログ記事一覧</h1>
{% for post in posts %}
<div class="post">
<h2><a href="{% url 'post_detail' pk=post.pk %}">{{ post.title }}</a></h2>
<p class="date">公開日: {{ post.published_date }}</p>
<p>{{ post.content|truncatewords:30 }}</p>
</div>
<hr>
{% empty %}
<p>まだ記事がありません。</p>
{% endfor %}
{% endblock %}{% extends 'blog/base.html' %}
{% block content %}
<div class="post">
<h1>{{ post.title }}</h1>
<p class="date">公開日: {{ post.published_date }}</p>
<div class="post-content">
{{ post.content|linebreaks }}
</div>
<a href="{% url 'post_list' %}">← 記事一覧に戻る</a>
</div>
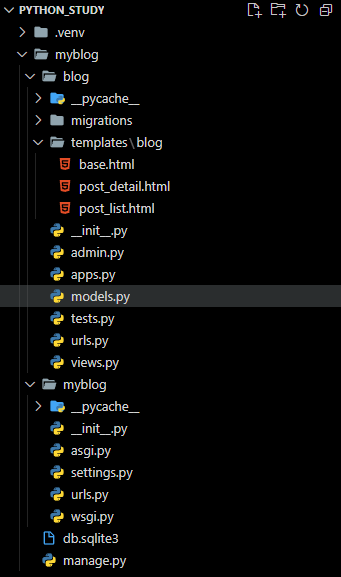
{% endblock %}ここでディレクトリ構造を再度チェックしましょう。新たに作成したのはblog/urls.pyと、templatesディレクトリのhtmlファイル3つです。
おまたせしました。これで設定はすべて終了です。いよいよサーバの起動です。
python manage.py runserver$ python manage.py runserver
Watching for file changes with StatReloader
Performing system checks...
System check identified no issues (0 silenced).
Django version 4.2.20, using settings 'myblog.settings'
Starting development server at http://127.0.0.1:8000/
Quit the server with CTRL-BREAK.うまくいくとこのような表示が出ます。まずはhttp://127.0.0.1:8000/admin/にアクセスしてみましょう。
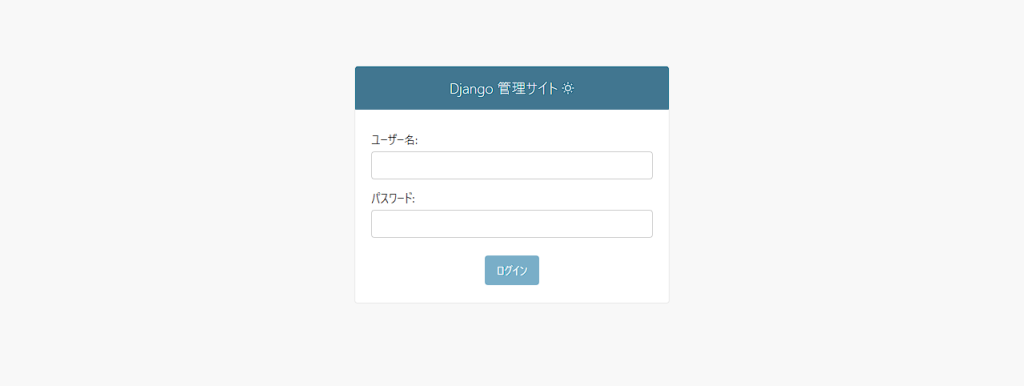
このようなページにアクセスできたでしょうか。管理者アカウントの設定で記入したユーザ名とパスワードを入力してログインしてみましょう。成功すると管理サイトが表示されます。

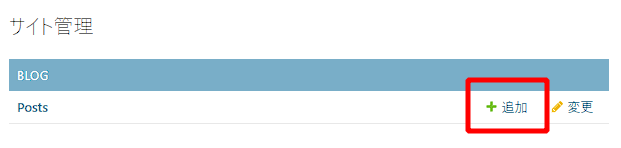
試しに記事を作成してみます。Postsの追加をクリックしましょう。
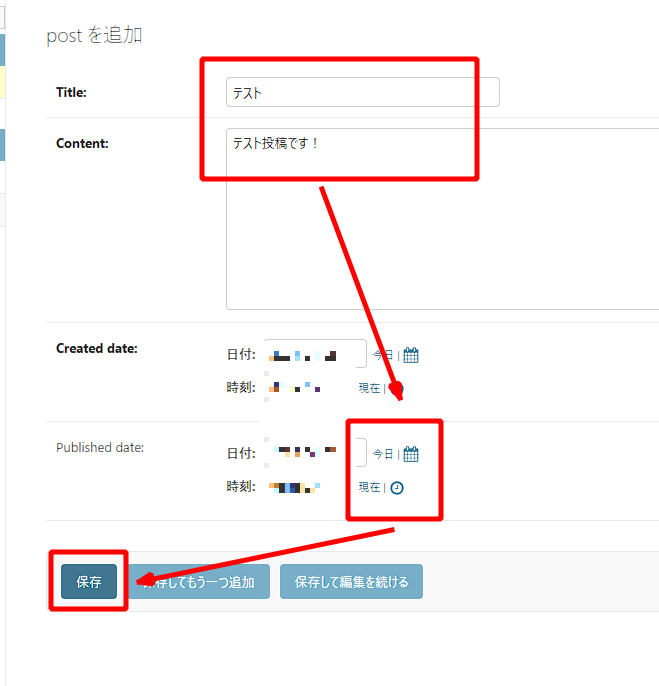
タイトルと本文を入力したのち、Published dateを今日・現在を押下します。最後に保存ボタンを押せば作業は終了です。Published dateを設定しないで保存すると、サイトには表示されず下書き状態となります。
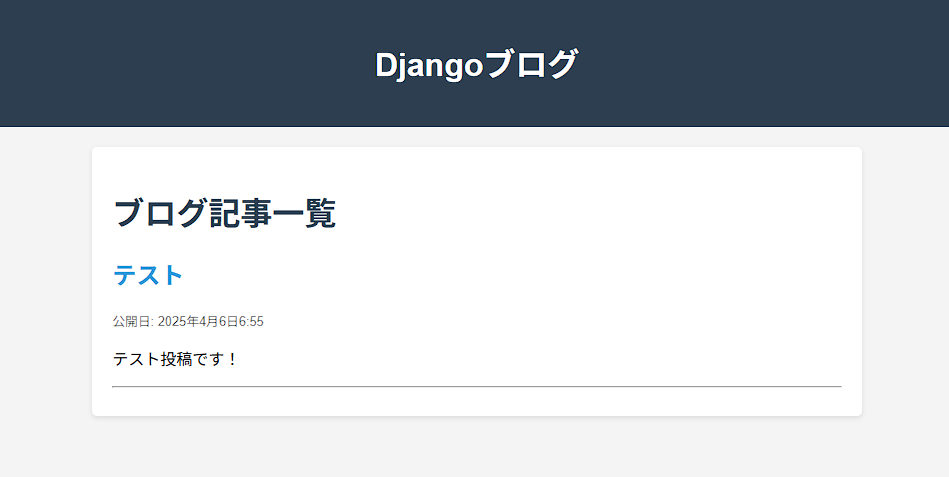
画面右上のサイトを表示を押してみましょう。
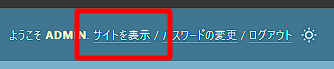
なんと先ほど作成した記事が表示されています!
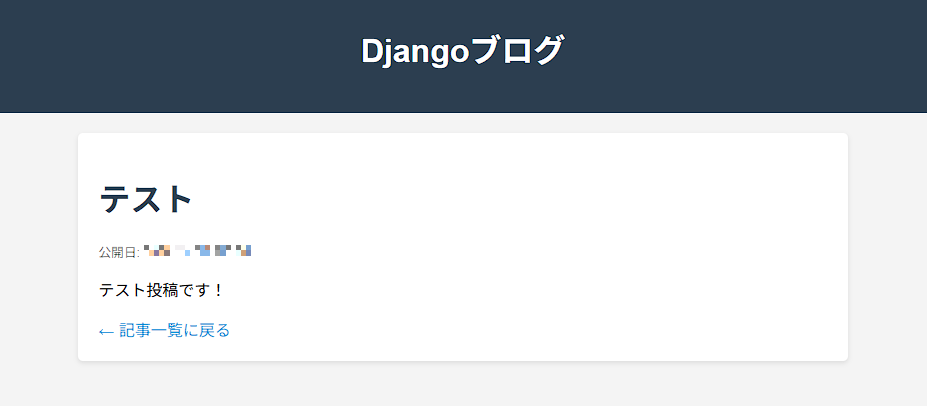
テストをクリックすると、記事の詳細ページに遷移します。
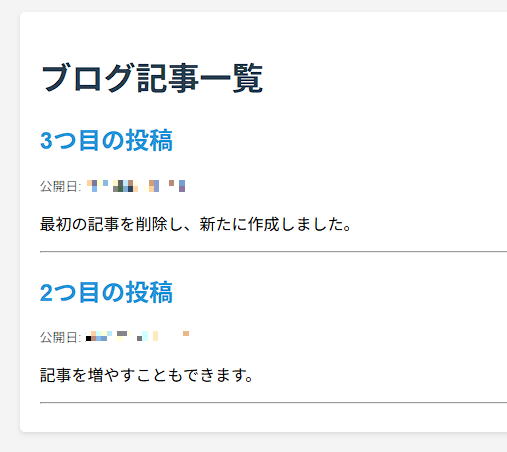
もちろん管理者ページに戻って記事を新たに作成することも削除することもできます。

このように、管理者ページや認証、データベースの連携からルーティングまでを比較的に楽にできるのがDjangoです。
ただ、管理者ページもデータベースとの連携もいらない場合はDjango機能群はやや過剰です。特に卒研で数枚のWebページが表示できればいいよ~、みたいなケースなら尚更です。
そういう場合はFlaskのような小規模向けのフレームワークが有効です。
Flask
Flaskはとにかくシンプルです。拡張性も高く、小~中規模までのサイト構築をサポートしてくれます。操作感はJavaScript開発環境のNext.jsやNuxt.jsに近いです。
今回は簡単さを前面に押し出したデモを用意しました。まずはFlaskをインストールしましょう。
pip install flask次にapp.pyを作成し、以下の内容を書いていきましょう。
# app.py
from flask import Flask

# Flaskアプリケーションのインスタンスを作成
app = Flask(__name__)


# ルートURL("/")にアクセスしたときの処理
@app.route("/")
def hello_world():
    return "Hello, World!"


# アプリケーションを実行(開発サーバ起動)
if __name__ == "__main__":
    app.run(debug=True)
これで必要最低限の設定は完了です。
python app.py実行すると開発サーバが起動するので、http://127.0.0.1:5000/にアクセスしてみましょう。
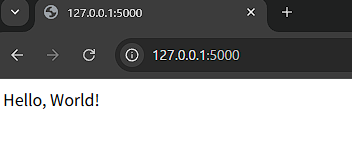
Hello, World!と表示されれば成功です。Djangoと比べると表示内容には天と地ほどの差がありますが、裏を返せばシンプルなことをするならFlaskで十分といえます。
ただ、これだとあまりにもシンプル過ぎるので、複数のディレクトリとファイルを使用する場合の方法にも触れていきます。
まずは画像のようなディレクトリ構造にしてください。
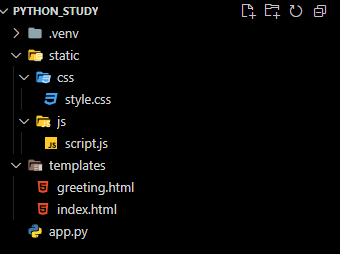
static
┗css
 ┗style.css
┗js
 ┗script.js
templates
┗greeting.html
┗index.html
app.py
Djangoと同じように、HTMLファイルはtemplates、静的ファイルはstaticに配置します。
Python
from flask import Flask, render_template
from datetime import datetime

app = Flask(__name__)


@app.route("/")
def index():
    return render_template("index.html")


@app.route("/about")
def about():
    return render_template("about.html")


@app.route("/greeting/<name>")
def greeting(name):
    if not name:
        name = "ゲスト"
    current_time = datetime.now().strftime("%H:%M:%S")
    return render_template("greeting.html", name=name, current_time=current_time)


if __name__ == "__main__":
    app.run(debug=True)
まずはapp.pyです。@app.route(リンクパラメータ)の下に関数を配置することで、アクセス時に関数を発火できます。HTMLファイルの表示であれば、render_template(HTMLファイル)を返せば表示されます。
HTML
<!DOCTYPE html>
<html>
    <head>
        <title>ホーム</title>
        <link
            rel="stylesheet"
            href="{{ url_for('static', filename='css/style.css') }}"
        />
        <script>
            // ボタンがクリックされたときの処理
            function goToGreetingPage() {
                const inputValue =
                    document.getElementById("greetingInput").value;
                // 入力値をURLエンコードしてクエリパラメータに追加
                const encodedValue = encodeURIComponent(inputValue);
                // 新しいURLを作成
                const url = `/greeting/${encodedValue}`;
                // ページ遷移
                window.location.href = url;
            }
        </script>
    </head>
    <body>
        <div class="container">
            <nav>
                <a href="/">ホーム</a>
                <a href="/greeting/ゲスト">ご挨拶</a>
            </nav>
            <h1>Flaskチュートリアルへようこそ!</h1>
            <p>これはFlaskを使ったWebページです。</p>
            <input
                type="text"
                id="greetingInput"
                placeholder="名前を入力"
                required
            />
            <button onclick="goToGreetingPage()">ご挨拶ページへ</button>
        </div>
    </body>
</html>
<!DOCTYPE html>
<html>
    <head>
        <title>ご挨拶</title>
        <link
            rel="stylesheet"
            href="{{ url_for('static', filename='css/style.css') }}"
        />
        <script src="{{ url_for('static', filename='js/script.js') }}"></script>
    </head>
    <body>
        <div class="container">
            <nav>
                <a href="/">ホーム</a>
                <a href="/greeting">ご挨拶</a>
            </nav>
            <h1>挨拶ページ</h1>
            <div class="greeting">こんにちは、{{ name }}さん!</div>
            <p>Pythonから取得した現在の時刻は {{ current_time }} です。</p>
            <p>
                JavaScriptから取得した現在の時刻は
                <span id="js-time">読み込み中...</span>です。
            </p>
        </div>
    </body>
</html>
HTMLファイルの記法は変わりません。ただ、Pythonと連携するためにいくつか覚えることがあります。
<link
  rel="stylesheet"
  href="{{ url_for('static', filename='css/style.css') }}"
/>1つ目がJinjaテンプレートです。
{{}}のようなテキストでPythonの変数や制御構文を囲むと埋め込むことができます。url_for関数はstaticや任意のフォルダのファイルにアクセスするための関数です。
# Pythonファイル
render_template("greeting.html", name=name, current_time=current_time)

# HTMLファイル
<div class="greeting">こんにちは、{{ name }}さん!</div>
<p>Pythonから取得した現在の時刻は {{ current_time }} です。</p>
この機能のおかげでJavaScriptでできない計算や処理をPythonに肩代わりさせることが出来るので、かなり有用です。
CSS/JS
// DOMが読み込まれたら実行
document.addEventListener("DOMContentLoaded", function () {
    // 時刻を表示する関数
    function updateTime() {
        const now = new Date();
        const hours = String(now.getHours()).padStart(2, "0");
        const minutes = String(now.getMinutes()).padStart(2, "0");
        const seconds = String(now.getSeconds()).padStart(2, "0");
        const timeString = `${hours}:${minutes}:${seconds}`;

        // 時刻を表示する要素を取得して更新
        const timeElement = document.getElementById("js-time");
        if (timeElement) {
            timeElement.textContent = timeString;
        }
    }

    // 初回実行
    updateTime();
});
body {
    font-family: Arial, sans-serif;
    margin: 0;
    padding: 20px;
    background-color: #f5f5f5;
}
.container {
    max-width: 800px;
    margin: 0 auto;
    background: white;
    padding: 20px;
    border-radius: 5px;
    box-shadow: 0 2px 5px rgba(0, 0, 0, 0.1);
}
nav {
    margin-bottom: 20px;
}
nav a {
    margin-right: 15px;
    text-decoration: none;
    color: #0066cc;
}
.greeting {
    font-size: 24px;
    color: #333;
    margin: 20px 0;
}
今回のFlaskには関係ないので、あまり言及するところは無いですが、JavaScriptファイルは時刻を取得するための関数です。今回、PythonとJavaScriptの両方で時刻を取得していますが、今回はどちらも同じ時刻になるはずです。Pythonのサーバが遠隔地にあると数秒のずれが発生するかもしれません。

こちらのサイトは日本標準時と端末時間のずれを確認できます。
以上でFlaskのチュートリアルはおしまいです。静的ファイルはJinjaテンプレート以外は変わらず、Pythonも@app.route()を覚えればあとはこれまでの内容を使うことが出来ます。学習コストが低いので、Webサイトを構築するために使用するほか、Pythonで作成したシステムのUIをブラウザで作るために使用するケースなどもあります。
まとめ
Web開発はNodeやRustを使うのが一般的ですが、サイト利用者の行動から統計処理をしたり、AIと連携したい場合はDjangoやFlaskが有効です。Djangoは学習コストが高いので、データベース連携やセキュリティを考慮したい場合は使用するべきですが、研究で利用する場合はFlaskがおすすめです。
これで全6回のPythonチュートリアルは終了です。まだまだ取り扱っていない内容は多いですが、Pythonの利用ケースと概要を扱うことはできたと思います。あとは皆さんの利用したい分野を調べながら開発していただければと思います。